| Introduction |
| ------------------------------------------------------------ |
| |
| WeatherService lets you collect, share and organize |
| measurements of weather stations. A station can be public |
| available or only for registered users. |
| |
| |
| Setup |
| ------------------------------------------------------------ |
| |
| Dependencies |
| ------------ |
| |
| The solution is based on .NET Core 2. To install |
| dependencies go to the checked out "WeatherService" |
| directory and run these commands: |
| |
| $ dotnet restore |
| $ cd WeatherStation |
| $ bower install |
| |
| |
| Database |
| -------- |
| |
| WeatherService uses LINQ to DB for database access. You find |
| scripts for Firebird and SQLite in the SQL subfolder. |
| |
| Creating a SQLite database is simple: |
| |
| $ sqlite3 database/WeatherService.db < SQL/sqlite.sql |
| |
| After setting up the database define the connection string |
| and database provider in the configuration file |
| "WeatherService.ini". |
| |
| |
| Administrator Account |
| --------------------- |
| |
| Now it's time to start the web application: |
| |
| $ dotnet run |
| |
| Visit the following website to create the administrator |
| account: |
| |
| Login and change the password under "My Account" -> |
| "My Profile". |
| |
| |
| Quick Guide |
| ------------------------------------------------------------ |
| |
| User Accounts |
| ------------- |
| |
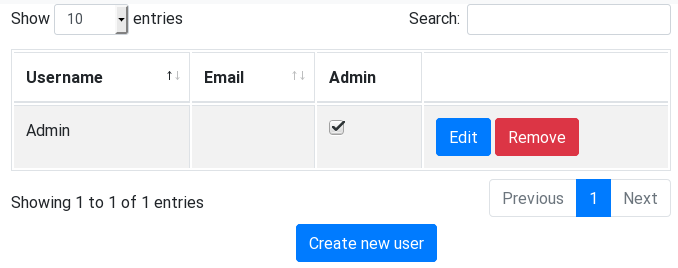
| Go to "Administration" -> "User Accounts" to manage users. |
| The following screen displays a list of registered user |
| accounts. |
| |
| User Accounts 1 |
| |
| Click the "Edit" or "Remove" button to change or delete a |
| user profile. A new user account can be created with the |
| "Create new user" button below the table. |
| |
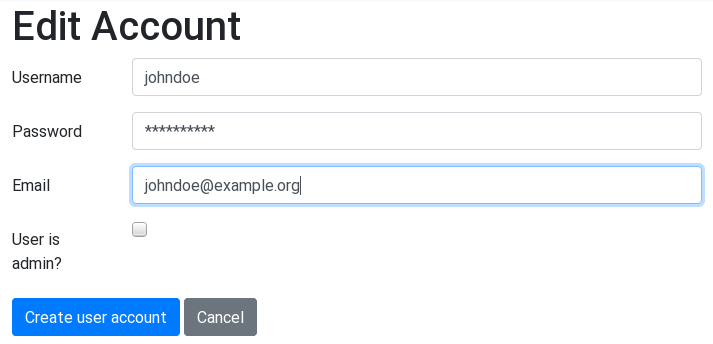
| User Accounts 2 |
| |
| Users must have a unique login name and password. |
| Additionally, you can set an optional mail address. |
| |
| By setting the "admin" flag an account is allowed to access |
| the user and weather station management screens. |
| |
| |
| Weather Stations |
| ---------------- |
| |
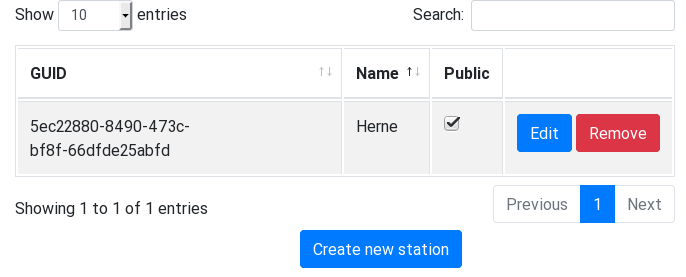
| Go to "Administration" -> "Weather Stations" to organize |
| weather stations. The following screen displays a list of |
| existing stations. Each one has an automatic generated GUID. |
| |
| Click the "Edit" or "Remove" button to change or delete a |
| weather station. A new station can be registered with the |
| "Create new station" button below the table. |
| |
| Weather Stations 1 |
| |
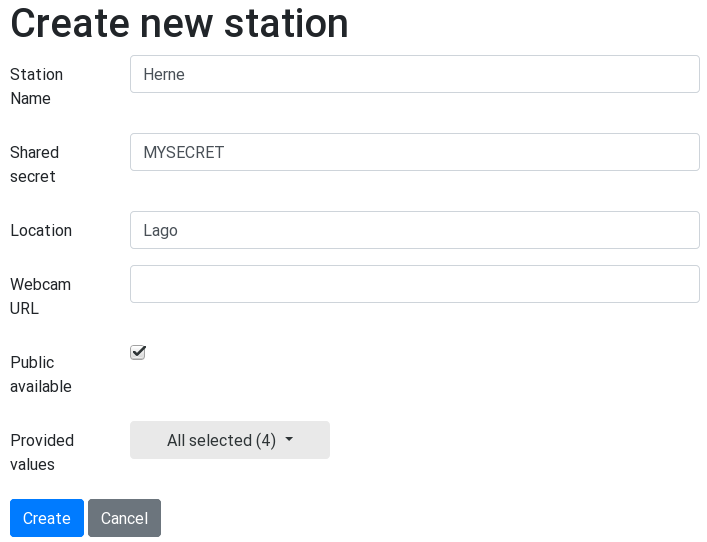
| Station names have to be unique. The shared secret is |
| required if you want to upload measurements with the REST |
| API. |
| |
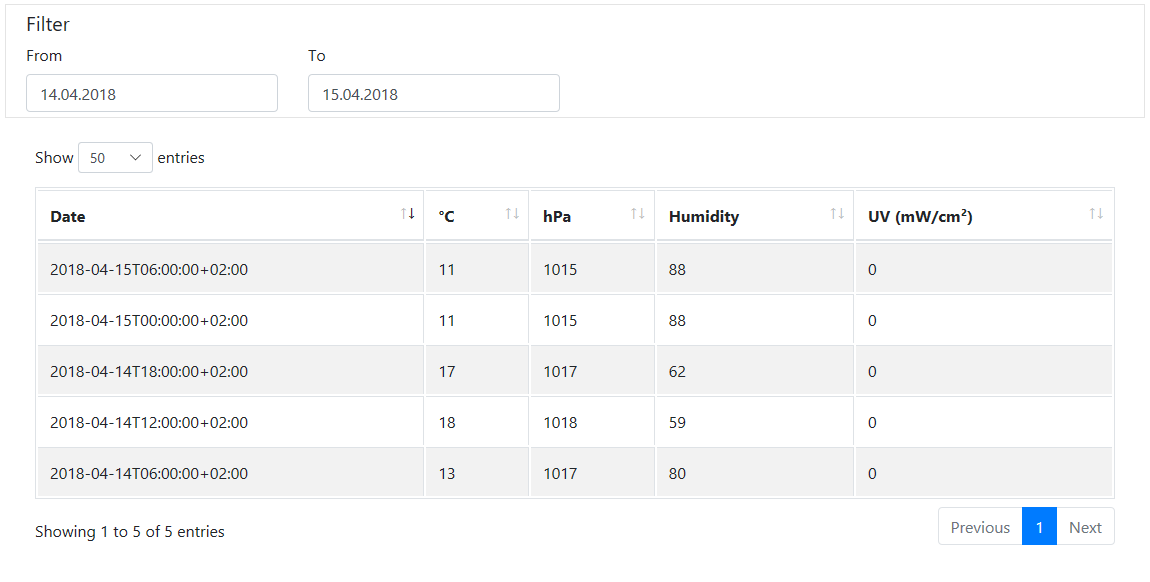
| At the current stage a station can provide Temperature (°C), |
| Pressure (hPa), absolute Humidity (percent), UV (mW/cm²) and |
| a webcam link. |
| |
| By setting the "public" flag a station is accessible anonymously. |
| |
| Weather Stations 2 |
| |
| |
| Log Values |
| ---------- |
| |
| To display measurements select a station from the "Stations" |
| list. |
| |
| Measurements |
| |
| |
| Dashbaord |
| --------- |
| |
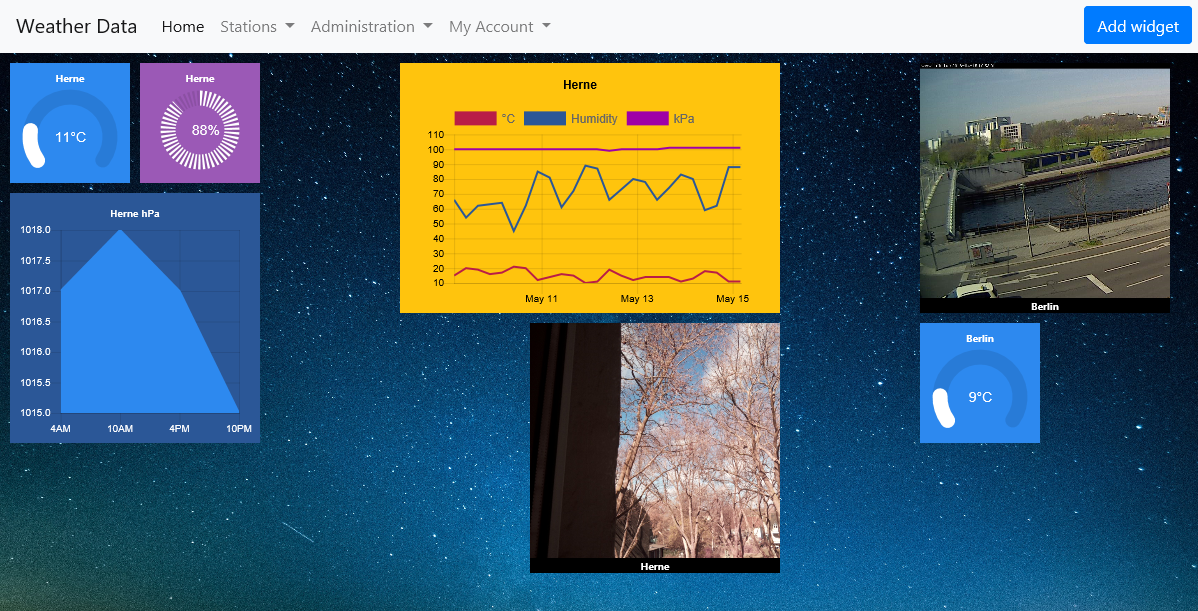
| Users have their own customizable dashboard. It's possible |
| to add widgets and move them by drag & drop. |
| |
| Dashboard |
| |
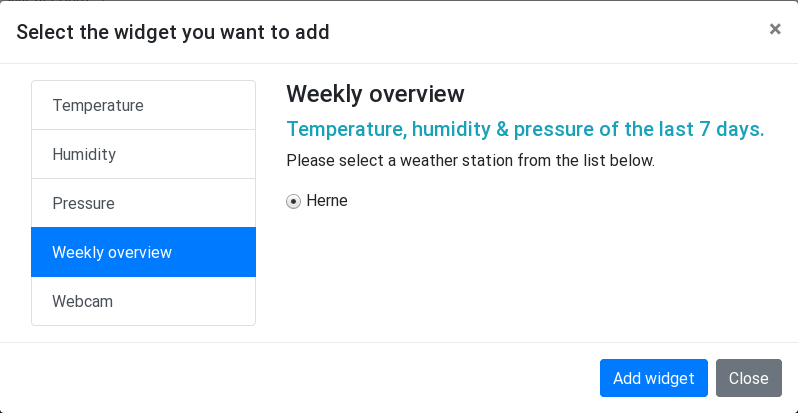
| The "Add widget" button opens a dialog where you can chose a |
| widget that you want to show on your dashboard. |
| |
| Widget 1 |
| |
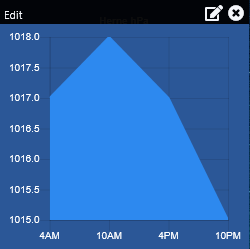
| Move the mouse cursor over a widget if you want to delete it or change the data source. |
| |
| Widget 2 |
| |
| |
| REST Interface |
| ------------------------------------------------------------ |
| |
| To send your measurements post a JSON array to |
| /api/WeaterLog/{guid}. The example below describes the |
| format: |
| |
| [{ timestamp: 1523899859, // UNIX timestamp (UTC) |
| temperature: 23.5, |
| pressure: 998, |
| humidity: 55, |
| uv: 0.31 |
| }] |
| |
| |
| Authentication |
| -------------- |
| |
| The client has to send the following HTTP headers for authentication: |
| |
| * X-WeatherStation-SenderId GUID of the station |
| * X-WeatherStation-Timestamp current UNIX timestamp (UTC) |
| * X-WeatherStation-HMAC lower case hexadecimal checksum of the timestamp |
| |
| The timestamp is hashed with HMAC-SHA1: |
| |
| HMAC_SHA1($timestamp, $secret) |
| |
| |
| Links |
| ------------------------------------------------------------ |
| master.zip |
| GitHub |